After a great morning hiking mostly uphill from 6,600 ft, we spent a very long time having lunch and waiting for it to start raining so we could experience trekking in the rain. 😉 And we did just that most of the afternoon. We didn’t make it to our destination of Paiya for the night stopping instead at Kari La, a pass at 9,600 ft. We had been 2,000 ft higher a week earlier and in another week we would be at around 18,000 ft crossing the first of two high passes on our way to Kala Patthar and Everest Base Camp.
After checking into the lodge I wandered around with my camera. The rain had stopped and the Khumbu valley was opening up. It was going to be an interesting sunset after all—one of the first of the trip. I took a 3-shot panorama and then another peeking through the amazing trees at the distant mountain, Thamserku, and the colorful clouds. I’m using the single photo here as an example of how one can edit a photo to more closely resemble what the eye sees. One key here is the camera only records a limited dynamic range, around 5-8 stops of light (factors of two in brightness) depending on whether one is shooting JPEG or raw. Yet the eye can see 16 or more stops. We have a wonderful ability to squint at the bright parts of a scene and also see detail in the shadows.
The photo on the left is what my camera would have recorded if I was shooting JPEG. I shot this contrasty scene at f/16 (I wanted a lot of depth of field), 1/40 sec, ISO 800, and 36mm. I did not take the time to unpack the lightweight tripod I was carrying. I did take a few minutes to hang a few wet clothes on a line above a wood stove in the dinning room. In these lodges, it is important a claim a little bit of drying space as soon as one can.
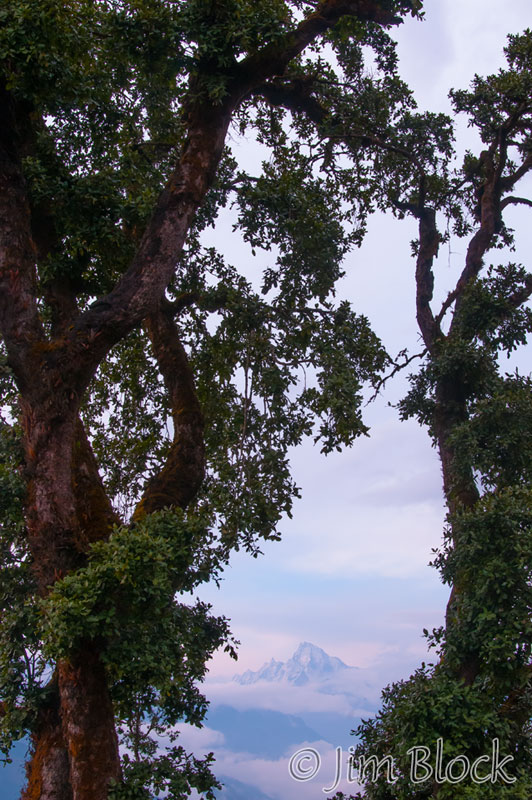
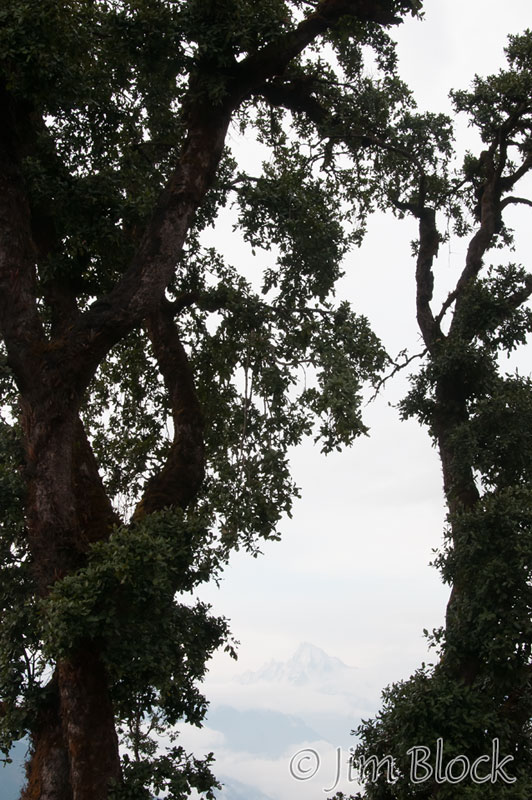
You can see the JPEG capture produces a rather bland scene with the colors washed out and the tree mostly a silhouette. However, since I was shooting raw, I could significantly improve the image in the raw processing. I used Adobe Camera Raw (ACR) in Bridge which is the same processing engine found in Lightroom. The photo on the right is after the raw processing. I could have used ACR to process a JPEG version, as many people do mistakenly thinking they are getting the advantages of shooting in raw. That would have improved the photo somewhat, but not given me the detail and tonal range that I was able to get, and later utilize, by using the raw capture. And I could have worked harder processing the raw version and perhaps gotten to a slightly better place than the right hand photo. But this is really a job for Photoshop and layer masks, not the “fake” masks of the Adjustment Brush in ACR.
For the version below I started with the right hand image above and finished job in Photoshop (CS6). The master image I produced has 8 layers, 5 of them Curves Adjustment Layers with masks. One mask was hand painted, the others used the tonal information in the image to mask the adjustment itself. The purpose of the post is not to explain in detail the steps, rather to show what can be done when the original capture contains all the tonal information and the processing makes good use of what is available. In producing the final image which I believe is a fair representation of what I saw, I did not add anything that was not present when I took the photo.
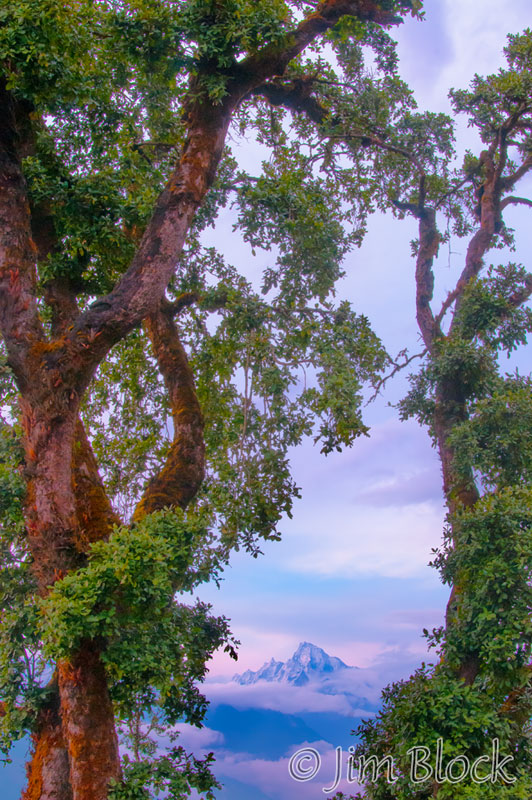
Incidentally, many “advanced” photographers would make multiple exposures of this scene planning to blend them later using High Dynamic Range (HDR) techniques. There is nothing wrong with this; I might have done it myself if I wasn’t so cold, wet, and tired. But many people apply HDR software to images that already have a full tonal range and hence can be successfully, and often better, optimized using more standard and less “automatic” techniques.